Menus
First let’s go over why menus are important. Menus determine how visitors will interact with your content. They drive navigation and without functional navigation, your ePortfolio is all but useless. Good navigation will allow your visitors to successfully search your site, and they will stay longer as they will be they will be able to find what they are looking for without extraneous scrolling or button clicking. This may sound daunting, but the only thing you need to remember is KEEP IT SIMPLE!
Visitors will read your menu from left to right so make sure the most important links come first. Also, it looks untidy if titles are lengthy so keep them short. (See Customizing Menu Items below) Short, sharp and punchy link names work best to capture your readers attention!
Most often, menus appear in the header and/or footer of a website, the default placement of your menu will depend on the theme you have chosen. Commonly the site’s menu will appear near the top of the page as a horizontal bar below the site’s title. On a mobile device, the menu may appear as a hamburger icon (three short horizontal lines) in the top left or right corner of the device.
Note: Your menu will need to be set each time you change your theme.
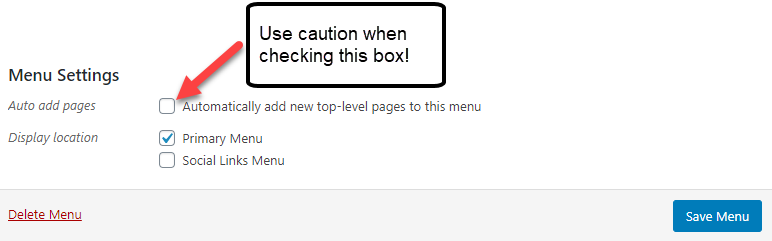
HELP! What if pages are automatically appearing in my menu!
Generally this means one of two things:
- You have not defined a custom menu yet, by default WordPress will add any new pages to your menu.
- You have not unchecked the option to automatically add new pages to your custom menu.
Defining a Menu
The following steps outline how to define a menu. You must define a menu before you can add items to it:
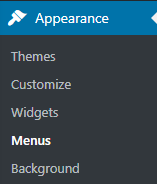
- Click Appearance then click Menus
- Select create a new menu at the top of the page.
- Enter a name for the menu in the Menu Name box.
- Click the Create Menu button.
Adding the menu to your site
If your current theme supports custom menus, you will be able to add your new menu to one of the Theme Locations.
- Scroll to the bottom of the menu editor window.
- In the section titled Theme locations, click the check box for the location where you want your menu to appear.
- Click Save menu once you’ve made your selection.
Adding Items to a Menu
You can add different link types into your menu. These are split between panes left of the menu you’re currently editing.
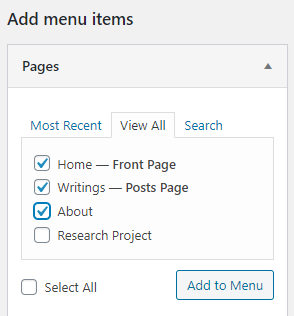
- Locate the Add menu items pane. (For these instructions we will be using the Pages pane)
- Within this pane, select the View All link to bring up a list of all the currently published Pages on your site.
- Select the Pages that you want to add by clicking the checkbox next to each Page’s title.
- Click the Add to Menu button located at the bottom of this pane to add your selection(s) to the menu that you created in the previous step.
- Once all the items have been added you can drag and drop them into the order you wish for them to appear.
- Click the Save Menu button once you’ve added all the menu items you want.
Customizing Menu Items
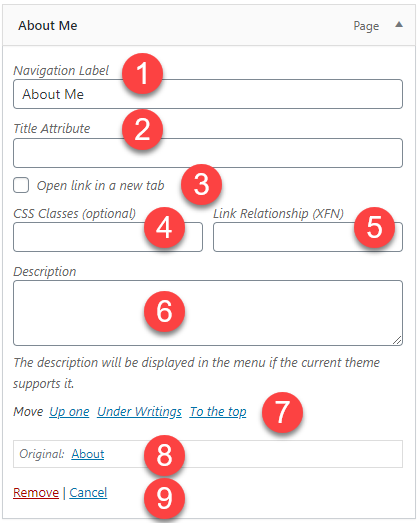
- Navigation Label: This is what your visitors will see when they visit your site/blog, consider using short, sharp and punchy link names.
- Title Attribute: This field specifies the Alternative (‘Alt’) text for the menu item. This text will be displayed when a user’s mouse hovers over a menu item.
- Open link in new tab checkbox: opens linked page/post/url in a new tab
- CSS Classes: Optional CSS Classes for this menu item
- Link Relationship (XFN): Allows for the generation of XFN attributes automatically so you can show how you are related to the authors/owners of site to which you are linking. See Link Relationship for details.
- Description: Description for this link. The description will be displayed in the menu if the current theme supports it.
- Move: moves the item within the menu
- Original: A link to the original item, don’t forget to save your changes before you navigate away from the menu
- Remove/Cancel: Remove, removes the item from the menu, it does not delete the page/post. Cancel, cancels the custom changes you have made to the item
Creating Drop-down (Multi-level) Menus
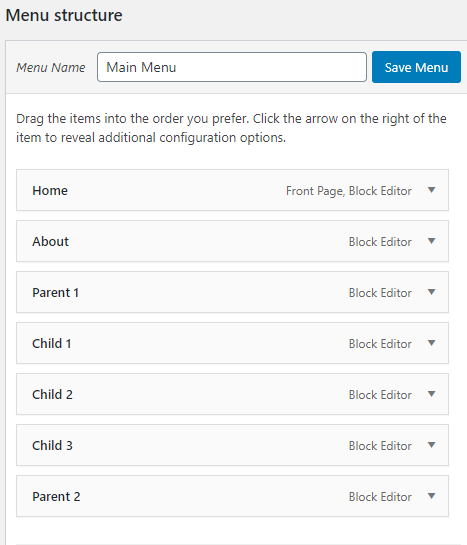
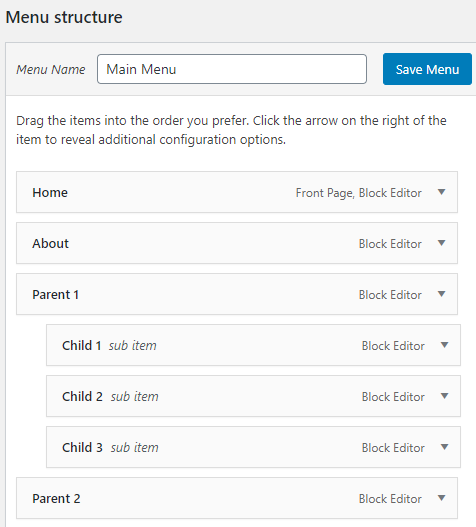
Using drop-down menus keeps your sites navigation simple and clean. We caution on going too deep as it can be frustrating for people who are accessing your site on a mobile device. If possible, keep your menu structure to 2 levels. When planning your menu’s structure, it may be helpful to think of each item as a heading in a report. Imagine creating the table of contents for this report: All the level 1 headings are nearest to the left, level 2 headings are slightly indented to the right, level 3 headings are indented even further to the right. WordPress has a simple drag and drop interface for creating drop-down menus. If you have not ordered your menu items by dragging and dropping into the correct order as indicated in step 5 of Adding Items to a Menu you should do so now.
To create a drop-down list in your menu you need to position the “child” under its “parent.” The following instructions outline how to create drop-down (multi-level) menus:
- Ensure the menu items are in the correct order.
- Position you mouse over the “child” menu item.
- Hold the left mouse button down and drag the item to the right, release the button.
- Repeat steps 2 and 3 for each child item.
- Click the Save Menu button.
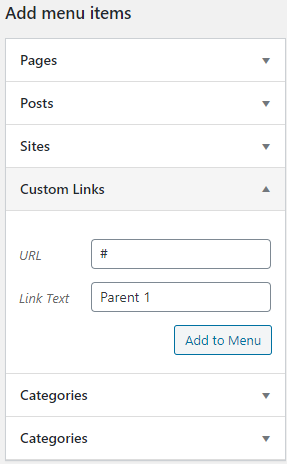
One final thought, what if you want the “parent” to only be a label, text only? You can have a “parent” menu item be just text, here’s how:
- From your dashboard click Appearance > Menus
- Below the heading Add menu items select Custom Links
- In the URL field replace https:// with #
- Add your navigation label in the Link text field
- Click Add to menu
Want more information and instructions regarding your menus in WordPress, check out How to Add Navigation Menu in WordPress (Beginner’s Guide) at: https://www.wpbeginner.com/beginners-guide/how-to-add-navigation-menu-in-wordpress-beginners-guide/
We recommend you delete this text and add your own. If you want to keep a version of this, you can clone it and then save the duplicate as a draft.